はじめに
Angular で SPA(Single Page Application)を作成したはいいけれど、ソーシャルログインを行おうとするととたんにハードルが高くなります。
ネット上でも、まとまった情報というのはあまりありません。英語でもごくわずかでした。
この記事では、Angular を使用した SPA で、Google の OAuth 認証を行う方法をご紹介します。
なお、動作確認環境は以下のようになります。
- macOS Mojave
- Visual Studio Code
- Angular: 6.1.10
Google OAuth 認証クライアント ID の取得
まず、Google API Console にアクセスして、Google OAuth 認証用のクライアント ID を取得します。
Google APIS のロゴの横のプロジェクト名から「プロジェクトの選択」を開き、「新しいプロジェクト」から新規プロジェクトを作成します。ここでは「OAuthDemo」とします。
API とサービス > 認証情報 > 認証情報を作成 > OAuth クライアント ID から認証情報を作成します。
下図のように指定します。

設定が済んだら、クライアント ID を控えておきます。
なお、このクライアント ID とクライアントシークレットは、外部に公開しないようご注意ください。
サンプルアプリケーションプロジェクトの作成
下記コマンドを実行して、サンプルアプリケーションのプロジェクトを作成します。
なお、OAuth 認証を行うために、今回はangular-oauth2-oidcというライブラリを使用するので、そのインストールも行います。
$ ng new oauth-demo
$ cd oauth-demo
$ npm i angular-oauth2-oidc --save
OAuth 認証を行うように修正
作成したプロジェクトを、OAuth 認証を行うように Visual Studio Code 上で修正します。
src/app/app.module.tsを以下のように修正します。
ルート定義で、/index.html にアクセスがあった場合でも、/home にリダイレクトしています。
import { BrowserModule } from '@angular/platform-browser';
import { NgModule } from '@angular/core';
import { HttpClientModule } from '@angular/common/http';
import { OAuthModule } from 'angular-oauth2-oidc';
import { Routes, RouterModule } from '@angular/router';

import { AppComponent } from './app.component';
import { HomeComponent } from './home.component';

const appRoutes: Routes = [
  {path: 'home', component: HomeComponent},
  // redirectTo は'/home'にすると情報を取得できなくなるので注意
  {path: '**', redirectTo: 'home', pathMatch: 'full'}
];

@NgModule({
  declarations: [
    AppComponent,
    HomeComponent
  ],
  imports: [
    BrowserModule,
    HttpClientModule,
    OAuthModule.forRoot(),
    RouterModule.forRoot(appRoutes)
  ],
  providers: [],
  bootstrap: [AppComponent]
})
export class AppModule { }
src/app/auth.config.tsを新規に作成します。
import { AuthConfig } from 'angular-oauth2-oidc';

export const authConfig: AuthConfig = {

  // Url of the Identity Provider
  issuer: 'https://accounts.google.com',

  // URL of the SPA to redirect the user to after login
  redirectUri: window.location.origin + '/index.html',

  // The SPA's id. The SPA is registerd with this id at the auth-server
  clientId: '000000000000-xxxxxxxxxxxxxxxxxxxxxxxxxxxxxxxx.apps.googleusercontent.com',

  // set the scope for the permissions the client should request
  // The first three are defined by OIDC. The 3rd is a usecase-specific one
  scope: 'openid profile email',

  // これをfalseにしないとエラーになる
  strictDiscoveryDocumentValidation: false,

};
src/app/app.component.ts を以下のように修正します。
コンストラクタで Google の OAuth にアクセスして、ログイン状態の場合はログインして情報を取得します。
import { OAuthService } from 'angular-oauth2-oidc';
import { JwksValidationHandler } from 'angular-oauth2-oidc';
import { authConfig } from './auth.config';

import { Component } from '@angular/core';
import { AlertPromise } from 'selenium-webdriver';

@Component({
  selector: 'app-root',
  templateUrl: './app.component.html',
  styleUrls: ['./app.component.css']
})
export class AppComponent {

  constructor(private oauthService: OAuthService) {
    this.configureWithNewConfigApi();
  }

  private async configureWithNewConfigApi() {
    this.oauthService.configure(authConfig);
    this.oauthService.tokenValidationHandler = new JwksValidationHandler();

    // awaitとしないとユーザーの情報が取得できない。
    await this.oauthService.loadDiscoveryDocumentAndTryLogin();
  }
}
src/app/app.component.htmlを以下のように修正します。
<router-outlet></router-outlet>
src/app/home.component.tsを新規に作成します。
import { Component } from '@angular/core';
import { OAuthService } from 'angular-oauth2-oidc';

@Component({
    templateUrl: './home.html'
})
export class HomeComponent {

    constructor(private oauthService: OAuthService) {
    }

    public login() {
        this.oauthService.initImplicitFlow();
    }

    public logout() {
        this.oauthService.logOut();
    }

    public get name() {
        const claims = this.oauthService.getIdentityClaims();
        if (!claims) {
          return null;
        }
        return claims['name'];
    }

    public get email() {
      const claims = this.oauthService.getIdentityClaims();
      if (!claims) {
        return null;
      }
      return claims['email'];
  }

  public get token() {
    const accessToken = this.oauthService.getAccessToken();
    if (!accessToken) {
      return null;
    }
    return accessToken;
  }
}
src/app/home.htmlを新規に作成します。
OAuth 認証で値が取得できた場合のみ、値を表示するように制御しています。
<h2 *ngIf="!name">
  Hello
</h2>
<h3 *ngIf="name">
  Hello, Name={{name}}, e-mail={{email}}
</h3>

<div *ngIf="token">
  Token={{token}}
</div>


<button class="btn btn-default" (click)="login()">
  Login
</button>
<button class="btn btn-default" (click)="logout()">
  Logout
</button>
動作確認
以上で OAuth 認証の対応が済んだので、実際に動作確認をします。
下記コマンドで、Web サーバーを起動します。
$ ng serve
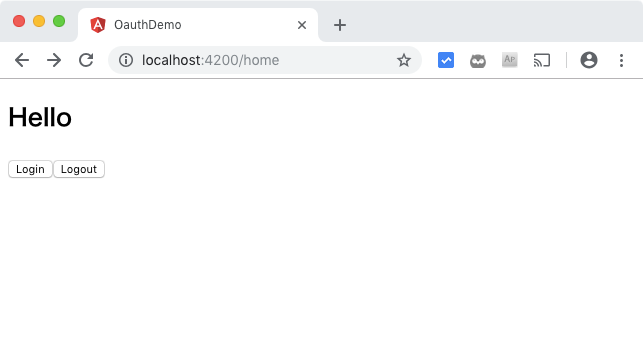
http://localhost:4200/にアクセスします。

「Login」ボタンをクリックすると、Google のログイン画面が表示されます。

名前、メールアドレス、アクセストークンを取得できているので問題ありませんね。

「Logout」ボタンをクリックすると、ログイン情報がリセットされます。

なお、このログアウトは、このサイトからログアウトしただけで、Google のログインからログアウトした訳ではないことにご注意ください。
ちょっと分かりにくいのですが、この状態で「Login」ボタンをクリックするとログイン画面が表示されずにログインします。
おわりに
いやぁ、想像していた以上にこの方法を調べるのに苦労しました。
Angular にまだ慣れていないということもありますが、とにかく情報がありません。
また、情報があっても直接には役に立たなかったりしますし。
罠もたくさんありましたしね。
でも、なんとか問題を解決して Angular な SPA で Google の OAuth 認証を行う方法が分かりました。
追記
Google の OAuth 認証を抜けてログイン後の画面に遷移するには、かなり苦労しました。
ログインは成功しているのに、ユーザー情報が取得できないためです。
その回避策をコードを掲載しておくので、参考にしてみてください。
import { OnInit } from '@angular/core';

  ngOnInit() {
    // Gooogle ページ初期化
    this.googolePageInit();
  }

 // Google ページ初期化
  private async googolePageInit() {

    // この非同期処理を行わないとユーザー情報が取得できない
    await this.oauthService.loadDiscoveryDocument()
      .then(() => this.oauthService.tryLogin())
      .then(() => {
        if (!this.oauthService.hasValidAccessToken()) {
          this.oauthService.silentRefresh((result) => {
            console.log(result);
          });
        }
      });

      // すでに Google にログインしている場合ログイン後の画面を表示
      const claims =  this.oauthService.getIdentityClaims();

      if (claims) {
           // AppCompoment の値を書き換え
           this.commonService.onNotifySharedDataChanged(true);

           // ルーティングでリダイレクト
           this._zone.run(() => {
             this._router.navigate(['listall']);
           });
       }
  }